Hidden beauty of nature
THE BEAUTIES OF NATURE - PHOTOGRAPHY

I probably "inherited" my interest,
admiration and love for nature from my father, who, in addition
to his gardening work, was mainly interested in the forest and
hunting. From an early age, I walked through the woods and
noticed trees, stumps, moss, lichens, stones and even the
smallest plants. In the 2nd grade, for Christmas, I received a
beautiful book about nature "Forest newpaper" by the
author V.Bianki, with nice pictures and engaging stories about
animals, plants and people living in nature....
My
main goal of nature photography is to show not only the
monumental beauty of mountains, forests, rivers, lakes,
ponds, but also mysterious forest nooks and hidden beauty
of things and details that we often do not even realize
and walk around them unnoticed.
That even in seemingly ordinary and mundane things, such
as a dewdrop, a snowflake, a fallen leaf, hoarfrost in
the grass..., there is a lot of impressive beauty. |
My photographic
beginnings
If I omit small experiments with a "pinhole chamber" (a cardboard box with a small hole that projects a
reduced inverted image on the back wall),
my first children's "photo camera" was Pioneer,
who with my brother (who took pictures only
rarely, sometimes a few moments of friends) received
as a Christmas present around 1959 (at that
time it cost a little over 50 CZK). It was
a simple bakelite device with a retractable lens (focal length f 70mm and aperture 1:5.6) and a lens viewfinder. Focused by rotating the lens,
which had a helix and drawn marks on the face (portrait) , figures (group photography) and landscapes (focus to "infinity").
Exposure times were "M" - snapshot (1/25, 1/50 and 1/100 sec) and
"T" (permanent shutter release
while holding the shutter button).
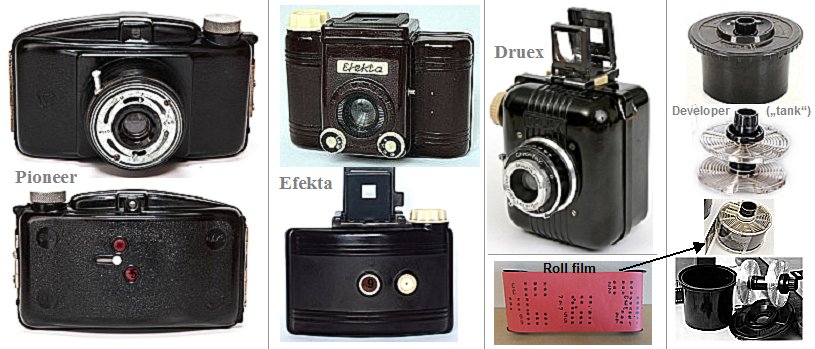
Soon after, we got two more simple
cameras Efekta and Druex (all
these simple cameras were manufactured by DRUOPTA) :
Efekta was also a simple bakelite
camera with a simple frame viewfinder, with a f 70mm lens,
apertures 8, 11, 16, 22, without focusing - "fix focus"
from about 1m to infinity. Shutter speeds 1/25, 1/50, 1/100 sec.
and "B" (permanent shutter
release while the shutter-release button is held).
Druex it had a slightly deeper bakelite
box, also with a frame viewfinder, with a lens of 75 mm aperture
1:6.3; marked aperture scale 6.3, 8, 11, 16, 22. Shutter speeds
"B" (permanent shutter release), 1/25, 1/50, 1/100 sec.
All these cameras were
photographed on a negative roll film of
type 120, width 61 mm and length 81 cm, on which 12 images of 6 x 6 cm format were
taken (some types, such as Pioneer, had the
option of inserting a frame for taking 18 images of format 4.5 x 6 cm). The roll film, wound on a spool, had a covering paper
strip, black on the inside and red on the outside, with
printed frame numbers; beneath it was his own film. This
light-tight cover paper (which is about 30
cm longer than the film at each end) allows
you to load and change the film with a spool in daylight. When
shooting, the film in the camera was shifted by turning the dial
up or on the side of the camera, watching the frame numbers
printed on the paper cover strip of the film in the transparent
red window on the back. The exposed film with the cover paper
strip is rewound on the second spool during shooting, which is
then removed from the camera. The empty spool from the original
film is moved to the other side and then another film is wound on
it.
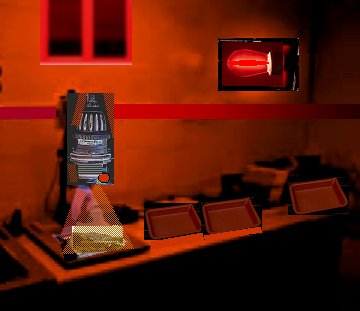
In a small pantry, which had
only one small window that could be easily darkened, we set up an
improvised "photo chamber", lit by a dim bulb covered
with two or three layers of red cellophane (later
a lamp called " aladin " with plug-in filters
of various colors). There we developed roll
films, from the beginning just by scrolling in a bowl filled with
a developer and then a stabilizer (in
complete darkness), later in a
"tank" where the film was spirally wound. The developing
"tank" (developer) is a black bakelite
cylindrical container with a lid, through the opening of which
passes the spool shaft with spiral grooves, on which the exposed
film is spirally wound in a spiral by gradual insertion (in the picture on the right there is a "tank"
for a roll film - at the bottom and for a cinema film - at the
top; winding took a little practice ...).
Pour about 1/2 liter of developer there, the spool rotates for
even development and in about 7-10 minutes the photochemical
developer reaction is complete. After rinsing with water (weakly acidified - interrupting solution) , a stabilizer is poured into the tank, which dissolves
the untreated silver bromide, followed by a thorough washing with
water (approx. 30 min.) and the film can be hung to dry.
Photochemical
reactions
Classic black-and-white photographic films (or formerly photographic plates) have
a thin emulsion of silver halides applied, now it is almost
exclusively silver bromide bound in gelatin. When
exposed to light, a photochemical reaction
occurs, in which part of the silver atoms is released from the
bond in the halide - a negative latent image is formed (hidden, so far invisible), formed
only by sparsely dispersed silver atoms.
The basic process of
"visibility" of the latent image in the photochamber is
the development of an exposed film, in which
colorless silver bromide is reduced to visible black silver
particles (it is described in more detail in §2.2 "Detection
of spectrometry "). The developer
is an aqueous solution of developing agents, mostly menthol,
hydroquinone, or phenidone, with alkaline reagents of carbonate
or sodium or potassium hydroxide. There is a gradual conversion
of illuminated silver bromide to metallic silver. The remaining
silver bromide from the unexposed areas of the film are then
dissolved in the fixer, which is usually a
solution of sodium thiosulphate.
In analogous way, the positive
images are pocessed after exposure to photographic paper.
Development and stabilization are performed in three flat
photographic dishes with a level of about 3 cm of developer,
interrupting bath and stabilizer. Because most photo papers are
not sensitive to red light, this positive process can be
performed and visually observed in low red light.
The color photography process is
briefly written below in the "Color Photography"
section.
Initially,
we only took photos on photo paper with a 1:1 contact using a
"copier" of our own production. It was a
cardboard box with a light bulb, which illuminated the developed
film (negative) with contacted photo paper. They were created
after developing a small photo of size 6x6 cm. The expositions were
initially timed only by estimation, later we had simple
exposition hours. And then we bought a magnifying device (Opemus 2a, see below) for
creating larger photos, and also a photo polisher.
Even with these simple means,
we managed to take a number of quite decent photographs, for
example :


 ... pictures
6x6 ...
Another, already somewhat more perfect
camera was Ljubitel (Russian Amateur), which
was a so-called two- lens reflex camera with the
possibility of precise targeted focusing. He had two lenses
: a photographic lensis a triplet f 75 mm, luminosity
1:4.5. Exposure times "B", 1/15s., 1/30, 1/60, 1/125
and 1/250 sec. Above it, a viewfinder focusing lens f 60
mm with a larger aperture of 2.8 was placed, which projected the
image onto the viewfinder screen *) by reflection through an
inclined mirror. Both lenses, provided with an extendable thread,
were mechanically coupled via gears on the circumference - so
when rotated, they extended and retracted simultaneously, thus
performing focusing. The correct sharpness was monitored on a
viewfinder screen with a magnifying glass. It was photographed on
a 6x6 cm
roll film.
*) At Ljubitel, the viewfinder consisted of
a large connecting lens 4 x 4 cm, provided in the middle with a circular mat with a
diameter of about 1 cm. She focused on it through a magnifying glass. This
viewfinder solution provided a brilliant image even in poor
lighting conditions, only focusing had to be done carefully on a
small circular screen in the middle.

I used Ljubitel and Flexaret until the end of my grammar school
studies.
More serious
photographic work with more perfect technology
None of the above cameras (even in their
much better variants - such as Lieca, Rolleiflex, etc.) were not suitable for the photographic genre I wanted to
focus on the most - displaying details of natural
objects from various perspectives, macro
photography. Immediately after graduating from
grammar school and joining the Charles University
Mathematical-Physical Faculty, I therefore bought a single-lens
reflex camera with interchangeable lenses, at that time the Praktica
FX3 type. I chose this type mainly because it had
an interchangeable viewfinder. Especially the shaft with a matte
and a magnifying glass, which monitored the cutout and sharpness from
above, which is advantageous for displaying details even
close to the ground (eg small flowers) and for macro photography. Furthermore, a viewfinder
with a prismatic prism could be used for normal
attachment to the eye (in the picture at
the bottom center). The lenses are
interchangeable, with different focal lengths and apertures. The
basic lens has a focal length of mostly 50 mm and an aperture of
about 1:2-2.8.

This single-lens reflex camera was
photographed on a 35 mm wide "cinema-film"
with perforated edges for precise film movement by means of a
gear drive. When shooting, the film is wound in a light-tight
cassette (pictured right) in a length of about 170 cm, which allows you to take
min. 32 frames of 24x36 mm size. When using fine-grained film (with careful development in a "fine-grained"
developer) high-quality photographs of 30 x 40 cm and larger
can be taken from them. When shooting, the film is wound in a light-tight
cassette can be taken from them. I often
bought films in "length" about 30 m and in the darkroom
I wound them and cut them into cassettes.
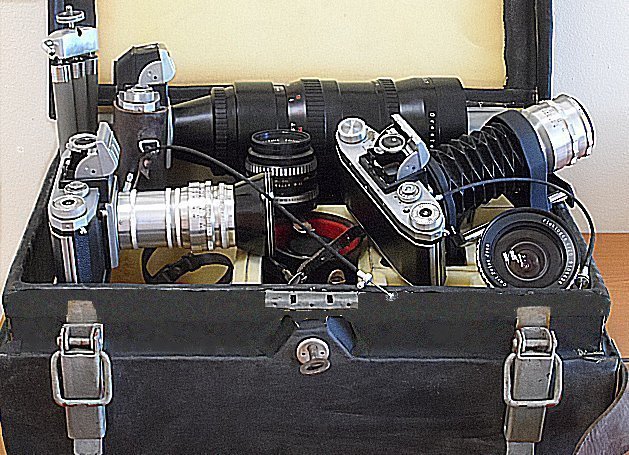
Gradually, I bought a number of accessory
components : wide-angle lenses, telephoto lenses, intermediate
rings and a "bellows" elevator for macro photography, a
set of filters (incl. Polarizing), tripods, mounts, etc. I made a metal suitcase
with compartments for these components, which were lined with a
soft foam layer for better impact protection (except for the tripod compartment).
The suitcase could be hermetically sealed, the rubber seal also
ensured water resistance.
However, I took this suitcase (which weighed about 17 kg in the complete set) only with me exceptionally, when I was planning more
complex compositions. Mostly I went out into nature only
"lightly" with two hanging cameras with black and white
and color film, exposure meter, in my pocket, in addition to a
few film cassettes, I had a wide-angle lens and intermediate
rings for macro photography. That was usually enough ...
I later
photographed with the EXAKTA RTL1000 and PENTACON
six TL devices at the NM workplace, but rarely, I did not
have as extensive accessories for them as at the Praktica.
Due to the photographic genre, which I mainly focused on, I did
not need to replace the Praktica FX3 type with newer
types with built-in automatic exposure and other improvements,
which are advantageous, for example, for reportage photography.
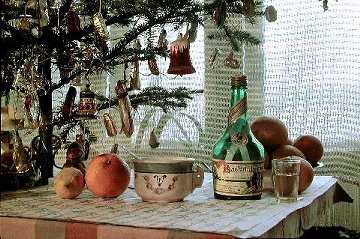
I like to remember how, during
my student days in Konice, during the Christmas and New Year
holidays, I often went out early in the morning with my camera,
before sunrise, to the forest hills of Bor, to meadows under the
forest, to frozen ponds and streams. I returned home in two or
three hours, warmed up a little in the living room by the
Christmas tree, perhaps even with the help of a small bootle of
plum brandy :
And I was already running impatiently to the photo-room to
develop the films - full of curiosity as to how the crystalline
beauty of winter nature was captured. They were happy moments of
joy from the beauty and harmony of nature..!..
Immediately after developing,
I examined the details on the negatives with a magnifying glass.
Then, after the film had dried, usually in the evening, I used a
projection on an enlarger to take the resulting positive
photographic images.
Color
photography - negative and inverse
The basic black and white photochemical process was briefly
discussed above in the section "Photochemical reactions".
Color photographic film has three layers of
photographic emulsion applied, which are sensitive to different
colors of light. These layers contain various filters and masks
to achieve separate color sensitivity. Each of these layers, in
addition to the crystals of silver bromide, contains special
organic substances which, when photochemically reacted and
subsequently developed in a color-forming developer, produce
different organic colors. Color-forming components (sometimes called couplers) in the emulsion layers there are
originally colorless organic compounds, containing mostly
methylene groups, from which azomethine and indoline dyes (yellow, purple and cyan colors)
are formed.
When exposed in the camera, a latent
monochrome image is created in each of these three layers. When
developed in a color-forming developer, images are then formed in
metallic silver (as in black-and-white
photography) , but at the same time the
developer reacts with the color-forming organic components
contained in the individual emulsion layers to form the blue, red
and yellow color components of the image. Metallic silver is then
removed by bleaching and stabilization, so that only a clear
color image remains on the film.
Color photography is more difficult
to process in a photo darkroom than black and white. The basic
classic method consists in shooting on color negative
film, which is then developed in a developing
tank in a special "color-forming" developer.
This developer (in addition to methanol,
hydroquinone for black and white photography) also contains special organic compounds, especially para-phenylenediamine,
which react with the color-forming components contained in the
individual layers of the color film to form dyes that form a
color image.
Then the bleaching and fixing
is applied to the film a bath that dissolves all unlit silver
bromide as well as induced black silver. This creates a color
negative image, in complementary colors. This is then
projected with a magnifying device onto colored photographic
paper, on which, after development in the color-developing
developer, stabilization and bleaching, the resulting positive
color image is formed. This process cannot be
performed in red light, as color photo paper is, of course,
sensitive to red light. It must be performed in the dark or in
low light with an "aladin" with a special dark green
filter.
In principle, each negative film can
be developed "positively" to directly obtain a density-
and color-accurate image - a slide, which is
observed in transmitted light or is magnified on a screen using a
slide projector. This so-called inverse development
for the formation of slides consists of several steps :
- The first
development of the exposed film in a "black and
white" developer, in which a negative image formed
by grains of metallic silver is created in all layers . The film
is rinsed with water.
- A second
exposure of the film to white light, in which any
remaining silver bromide (not developed in the first step) is
exposed to be capable of a second development. A latent positive
image emerges. Instead of exposure to
light, the so-called inverse bath can also be used, in
which silver atoms are chemically released from the halide,
serving as nuclei for induction; but I did not use this method.
- The second development
in the color- developing developer, in which the
remaining illuminated silver bromide is developed. This creates a
positive silver and positive color image (if
we looked at the film at this stage, it would be completely
black, because everything silver contained in the emulsion is
evoked).
- Bleaching
of the induced black silver in a potassium ferric acid solution,
in which the metallic silver is converted to silver ferric
ferrite, while the color positive image does not change.
- Stabilization in which
the silver compound formed by bleaching dissolves in a stabilizer
(based on sodium thiosulphate). Only the dyes formed during the second development
remain in the film - these form the resulting positive image.
Finally, a thorough washing of the film and, if necessary,
stabilization of dyes (in formaldehyde
solution).
For photographic processing (black
and white and color, negative and inverse), kits were
later supplied that greatly simplified the work. However, I
prepared all the solutions myself from basic chemicals...
Most of the samples of color
photographs listed below "Samples of some photographs from
nature" were created by
this inverse process.
These descriptions of procedures
and own experiences with film photography can now be a kind of reminiscence
:
- haw complicated
and laborious it was to photograph in the past -
Digital
photography
The first digital camera I started taking pictures with was the Nikon
Coolpix 990. From the point of view of nature
photography, it had a similar advantage as Praktica FX3 (and even more flexible):
independent rotation of the lens and electronic display, which
allows observing - enlarging and reducing, focusing, composing -
the photographed subject from above (pictured right). In addition,
Coolpix also has a lens viewfinder. The advantage of this
solution was mentioned above in the passage on Praktica FX3.

The basic lens has f 8-24 mm (3x optical zoom) and an aperture of
1:2.8-4. The CCD image sensor has 3.34 megapixels. Later I used
newer cameras with a much larger number of pixels (>10MP) and
zoom range, but I still liked the photos with Coolpix the most...
Technically perfect
digital photography <- versus
-> magical
chemical photography ..?..
Digital photography is, of course, a completely revolutionary
advance, allowing you to easily do technically perfect work with
possibilities we never dreamed of before ..! .. However, when you
nostalgically we remember, the work in the darkroom, illuminated
only by the faint red afterglow, had its magical charm: watching
the image gradually develop, barely noticeable at first, then
accentuating, and pulling it out of the developer at the right
moment and stabilizing it. Possibly, during the exposure we may
somewhat overshadow some overexposed areas. It was not just a
technique, but there was a bit of art
in it..!..
Photo-inflation -
or - why did I stop taking pictures ?
At the end of the 1990s, there was a completely exaggerated -
"inflationary" - increase in photography (especially in the wake of the advent of digital
technology). People began to take pictures of food on a
plate in a restaurant, from the holiday bringing thousands photos
without thinking "clicked", often from a mobile phone,
which is not even enough to view (let alone
process!), they only take up many gigabits on the
computer. It just started to be "over-photographed
"..!.. And what is too much is too much! I no longer enjoyed
make photos that interested almost no one - the quiet beauty of
nature in a consumer society is no longer
"attractive"...
Samples
of some photos from nature
During my photographic wanderings through nature, I took more
than 5,000 pictures on black and white and about 2,000 on color
film in about 30 years. Due to the limited capacity of
computer memory and also the desirable brevity that I
prefer, I will present only examples from a very small part of
this photographic material, according to my subjective choice -
especially according to which places and images I have a more
personal relationship (perhaps it will
address some other interested parties about nature..?..) :
| Texts
for pictures |
Image thumbnails
( click
to enlarge; back < - to go back) |
Winter - snowy waiting
hunting sitting in the forest Bor.
Gladea and the waiting hunting sitting above Kremenec was
a nice place in the Konice forests, near
"Hubert". From this waiting hunting sitting
there was a good view of the surrounding forests. Nice
young pines, spruces and firs grew on the slope around
the sitting area, and a small forest stream flowed down
below. In the sunny summer there was the smell of resin
and forest herbs, in the autumn needles and fallen
leaves, in the winter there used to be a lot of snow
..... |
 |
 |
Winter - a
feeder for forest animals under a tall fir tree on an
elevated spot on a glade above Jílovec. |
 |
 |
Winter - a
peaceful snow cover in the forest above Jílovec and a
snowdrift in the garden. |
 |
 |
Winter -
white crystals of hoarfrost on long green needles of pine
on the edge of the forest. |
 |
 |
Winter -
magnificent ice crystals grew
on a frozen pond on a frosty night . |
 |
 |
Winter -
icing around frozen water.
In winter, a beautiful icing of ice crystals sometimes
forms on each twig and stalk around the frozen water
during the frost.
This fleeting beauty in the sun soon melts, seldom, in
freezing weather, lasts for several days. |
 |
 |
 |
 |
Winter - hoarfrost on
grass stalks.
To Hubert was approached from Konice by a picturesque
path on the edge of the forest and fields near Zavadilka.
In winter there used to be a lot of snow, trees, shrubs
and grasses were covered with beautiful hoarfrost and
icicles. |
 |
 |
Winter - a
small stream under the forest weaves between the snow.
It's not frozen yet ... |
 |
 |
Winter -
frost painted magical ornaments on the windows and ice on
the water, often with frozen bubbles (especially at the inflow of water into the
pond) . |
 |
 |
Autumn -
dew and later hoarfrost on fallen leaves. |
 |
 |
Autumn -
in the freezing morning the meadows turned white,
each leaf of grass is decorated with hoarfrost of ice
crystals. It shines beautifully in
the sun, which dissolves the hoarfrost until noon. |
 |
 |
Winter -
frost weaved a beautiful hoarfrost on all the remains of
plants protruding from the snow.
Even on the orange fruit of the cinchona under the grove
by the garden. |
 |
 |
Winter, early spring -
a forest stream and a waterfall above Křemenec is a very
remote and unknown place. A small stream, springing below
Štarnov, flows through the dense forest of Bor,
gradually picks up water and creates several nice small
waterfalls in a deep valley. In winter it is frozen, in
early spring it wakes up and starts to bubling again.
|
 |
 |
Spring -
jiva cats and hazel catkins woke up.
In a large drop of dew under a cat, a reduced inverted
image of the opposite forest trees is displayed. |
 |
 |
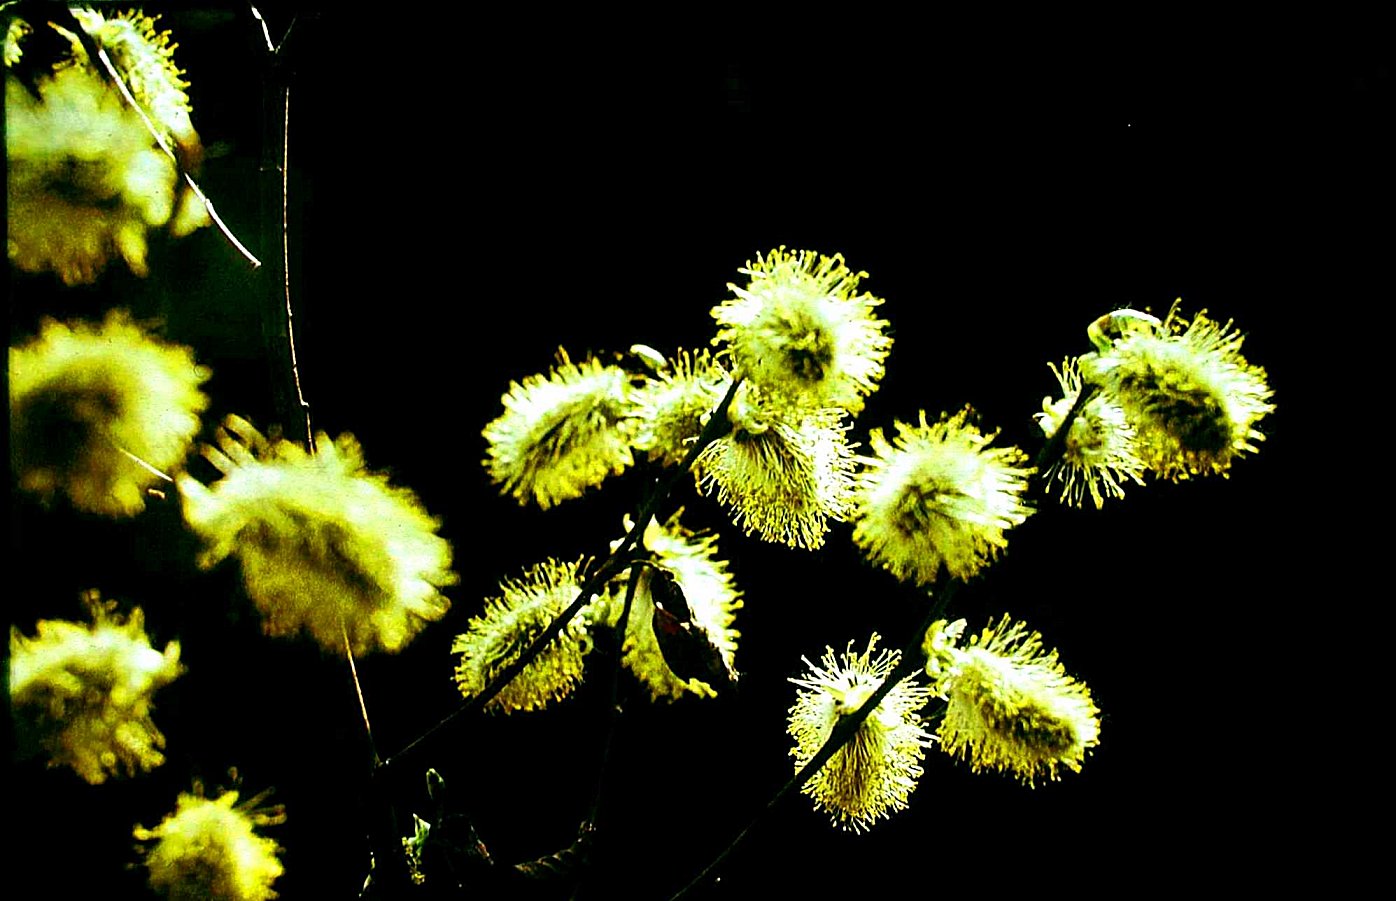
Spring -
larch and jiva bloomed. |
 |
 |
Summer - the
morning dew is decorated with glittering droplets of
grass blades, contryhel leaves and cobwebs on the edge of
the forest. |
 |
 |
Summer - memorial tree.
Above Strelnice and Jílovec, towards Zavadilka, on the
edge of the Bor forest, grows a huge old beech
, under which there is a nice hunting painting
called " Hubert " - the patron
saint of hunters, standing in reverence in front of the
sacred deer, on a stand in a glazed wooden box . Under
the locker is a memorial plaque to the hunters murdered
during the German fascist occupation in 1939-45. |
 |
 |
Early spring -
Bor forest and dark forest road above Kremenec, with the
last remnants of snow. |
 |
 |
Autumn - the
last remnants of fruit (plums, apples) on trees wit
fallen leaves. |
 |
 |
Autumn -
early fog and gilded autumn early evening in the Bor
forest. |
 |
 |
| ........ More
photos and texts will be added and well as the order and
arrangement will be adjusted ......... |
Black-and-white photographs were mostly taken on 25 ASA (15
DIN) film, color images were mostly on 125 ASA (22 DIN) inverse
films, all with their own development and further processing in a
photo chamber. The vast majority of images were taken quite a
long time ago (1968-80), when there was no digital photography.
Photos and slides had to be scanned for digitization, which could
lead to some reduction in quality - the maximum
resolution and full brightness and contrast scale cannot be used
for brilliant images. I apologize for these technical
shortcomings; I would like to focus more on the natural-aesthetic
side ...
Vojtech
Ullmann


 ... pictures
6x6 ...


